Chicken Enchiladas with Salsa Verde

                            Muy verde! 

                            Muy verde! 

I have this fascination with all things Mexican; the gorgeous people, the rich culture, the melodic language and of course, the food!   It all started on my first business trip to Mexico City.  I was covering Deloitte Globally for Sun Microsystems at the time and our team in Mexico treated me like gold, always. They nicknamed me "Pamelita" and entertained my horridly elementary Spanish whenever I came to visit. Anyway, so began my love for all things Mexican. 

Kelly loves it when I make these. It's one of her favorite Pamelita recipes. I've made them two ways because we're trying to lose a bit of blog-induced weight! One is traditional, with corn tortillas and the other is slightly better for us; no carbs.  We rolled the enchiladas in cabbage rather than tortillas.   Both were delicious! The cabbage-rolled enchilada was surprisingly fantastic!  The cabbage gave it a tasty tang that the corn tortilla didn't have.

In my humble Italian-girl opinion, the most important part of the enchilada is the salsa verde.  The sauce is a refreshing, yet spicy addition and it's very easy to make. 

What you'll need: 

  • 6 large tomatillos (husked) 
  • 2 garlic cloves, peeled and halved
  • 1/2 white onion, lightly chopped
  • 1/2 cup, chopped cilantro, not packed
  • 1 Serrano chile pepper, whole
  • 1 teaspoon Outerlimits hot sauce   
  • Food processor or blender  

In a large pot over high heat, cover the tomatillos with water and let come to a boil.  Lower to medium high heat and simmer 5-6 minutes. When they're done, their color changes to army or olive green.  Reserve  1/2 cup of the water they boiled in and toss all the ingredients into your food processor.

Voila! It's that easy.. 

The enchilada preparation is simple, as well. The chicken can me made any way you'd like but, the traditional preparation is boiled. In this recipe, you simply boil 8 boneless, skinless chicken thighs in a pot. (You can also use chicken breasts or chicken with the skin on).  In the pot I usually add 1/2 a white onion and 3 cloves of garlic. Boil until cooked but, keep in mind, these do bake afterwards so, be careful not to overcook them. When they're done, you can start your tortilla preparation while they cool. Take a fork to each thigh and pull them a part into strips for the enchilada.

The next step is in the tortilla preparation. You'll need a big frying pan or a small frying pan and a lot of patience! I use a big frying pan and fry the corn tortillas 3 at a time. You'll need corn oil in the pan, let it get hot and place the corn tortillas in the pan. This process is not to get them crispy, it's just to get them nimble. Place in the oil for about 15 seconds each side. You can lay them on paper towels until you're ready to use them and make sure you sprinkle them with kosher salt. 

To assemble the enchiladas,  pour 1 cup of the salsa verde on the bottom of the glass 9 x 13 baking dish.   Put some chicken and shredded cheddar into each enchilada and drag it through the dish, catching some salsa.  Repeat this process until your dish is full.  

Once the pan is full, sprinkle more salsa on top and top with cheese. I bake them at 400 uncovered for 20 minutes, this gets them a little brown on the outside and allows the cheese to melt. 

Let rest for 5 minutes and garnish by sprinkling 1/4 cup white onion on top and some fresh cilantro.

And, again, for the cabbage.. same drill as the tortillas in terms of filling them but, slightly different preparation. Place the full head of cabbage into a pot, bring to a boil and let boil for 15 minutes. Take the head out of the pot and let the cabbage cool completely. Peel pieces gently off the cabbage to form your healthy "tortillas." You'll still drag the tortilla through the salsa but, you definitely don't need to fry them in oil :) 

The process for stuffing them and lining them up in the baking dish is the same as the corn tortillas. 

Let us know what you think and enjoy! xo Measure

Black Bean and Sweet Potato Soup

black bean soup.JPG

Here in New Jersey its frigid.  Its 100% winter.  Sometimes when its this cold, I like to ignore it.   Not completely, I mean shorts & flip flops would be evidence of insanity, but a little mid-week, melt-me fiesta...? extremely sane.

This soup is perfect for my mood right now.  Its warm, spicy and creamy with a hint of the sunny, bright tropics.  Lime & cilantro will do that.   Margaritas will too.

Here's what you'll need:

IMG_4964.JPG
  • 2  13 oz cans of black beans, rinsed
  • 3 sweet potatoes, peeled and cubed 
  • 2  white onions
  • 4 cloves garlic, chopped
  • 4 cups chicken broth, low sodium
  • cilantro, 3 tbsp. chopped
  • 2 tsp cumin
  • 1/2 tsp cayenne pepper
  • 1/4 tsp cinnamon
  • 2 tbsp. olive oil
  • Lime, juiced
  • Hot sauce, 3-4 shakes (we like Outerlimits Jalepeno Lime)
  • salt & pepper

For Garnish:

  • fat free sour cream
  • lime slices
  • cilantro
IMG_4966.JPG

Here's what you'll do:

1.  In a large saucepan or Dutch oven, add the olive oil and chopped onion.  Cook on medium heat for 5-8 minutes until translucent and slightly browned.  Stir often.

2.  Add the garlic and all spices including salt & pepper, stir to combine.   Add broth, beans and sweet potato.  Add water or extra broth to cover, approximately 2 cups.   Heat until it reaches a boil.

3.  Reduce heat to low and let simmer uncovered for 15-20 minutes, until sweet potatoes are fork tender.   

4. If you are using a blender, let the soup cool.  Then ladle 3/4 of the soup into the blender in batches.  Blend until smooth and reserve in a separate large bowl.   Return the blended soup to the remaining unblended soup into the pot and stir.  Store or reheat at this point.

5.  If you are using a emulsion blender, blend leaving some chunks of potato and whole beans. 

6.  Once blended to your preference, stir in lime juice.  Taste for deliciousness and season with salt & pepper as needed.   Ladle into serving bowls and top with lime slices, sour cream and cilantro leaves.

Stay cozy, my friends.

xo & a pinch,

Kelly

IMG_4977.JPG

Minestrone with Great Northern Beans & Pesto

I love Christmas but for me, winter weather isn't ideal.  The cold, the early darkness, the dreary skies...I'm more of a flip-flop & margarita person!  Rather than just wish it all away, I make an effort to look out for the great things about the season.  Third to flannel shirts and red wine, soup is on the list of "a few of my favorite things."  (yes, I sang that part)

When you come home from work to a dark & chilly house, its so nice to set a pot of soup on the stove while you get yourself settled.   I make soup on the weekends when I'm cooking other things.  Its so easy to chop a few extra carrots & celery, a bit more garlic and throw together something satisfying, warm and healthy for mid-week.  

On the other hand, overcooked pasta is on my list of least favorite things.  When you re-heat soup, the pasta just softens... (I cringe).  For this reason, I boil the pasta separate.  

For this batch, I soaked and Great Northern Beans, which is a nice thing to do when time allows.  You get a bit more texture from the beans and you control the sodium, but a can of cannellini works just as well.

Heres what you'll need:

  • 2 carrots, chopped
  • 2 stalks celery, chopped
  • 2 cloves garlic, minced
  • 1 small onion, chopped
  • 2-3 tbsp. olive oil
  • 1  28 oz. can crushed tomatoes 
  • 1 28 oz. can of chicken broth or vegetable broth
  • 1 cup Great Northern Beans, soaked OR 1 large can cannellini or other white beans
  • 1/8 tsp crushed red pepper flakes
  • 1 tsp dried oregano
  • spinach, medium bunch
  • salt & pepper
  • Pesto to top, if desired
  • Parmesan cheese, grated on top, if desired
  • Ditalini, cooked

Heres what you'll do:

For the beans:

Inspect beans while rinsing under cold water. Cover beans with water and soak overnight.   Drain. 

For the Soup:

1.  In a large pot on medium heat, add olive oil, carrots, onions, celery and garlic and cook until tender. Add beans, tomatoes, broth, red pepper flakes, oregano, salt & pepper.  Let simmer on low heat until tomatoes cook, stirring occastionally, about 30 minutes.

For the pesto:

In a food processor, add 1 cup fresh basil leaves, 1 garlic clove, chopped, 1/4 cup of pine nuts (or walnuts), 1/4 cup grated parmesan and pulse until chopped.  Drizzle in about 1/4 cup of olive oil and continue processing until smooth.   (Or try "Pistachio Pesto" using our Search feature.) 

To serve:

In a shallow serving bowl, add cooked pasta, the soup and top with pesto and more parmesan cheese. 

Stay Cozy!

xo & a pinch!

Kelly

Β 

IMG_4956.JPG


Roasted Baby Peppers with Ricotta & Caramelized Onions

IMG_4809.JPG

Ok, so I have this weird little obsession with these little baby peppers.  I think about them a lot.  Way more than a girl needs to be thinking about peppers.  I think its their tiny, boat-like shape, just ready to be stuffed with whatever I want and then devoured in one bite!   I threw these together as an appetizer at Pam's birthday because baby peppers and fresh ricotta are always invited to our parties.  In fact, its not a party until they arrive... with the Prosecco.   

Heres what you'll need:

  • Baby peppers 10-12, halved and seeded
  • 3 white onions
  • brown sugar, 1 tsp
  • Ricotta Cheese, about 1/4 cup.
  • Worcestershire Sauce, 1-2 shakes
  • salt & pepper
  • olive oil, 2 tbsp.
  • butter, 1 tbsp.
  • fresh thyme leaves, for garnish

Here's what you'll do:

1.   Preheat the oven to 350 degrees while you prepare the peppers.

2.   Toss pepper halves, salt, pepper, olive oil together and then spread into an even layer on a baking sheet.   Bake for 10 minutes or until moderately softened.  Let cool.  Then pat dry with paper towel.

3.  In your largest skillet on medium heat, cook onions with butter and a bit of olive oil, Worcestershire, salt & pepper until reduced, brown and caramelized about 25-30 minutes.   Once the onions are browned, add brown sugar and stir to dissolve.  Add water (broth or wine) during the cooking process to prevent burning or sticking to the pan.  Let cool.

4. When your ready to serve, top each pepper half with a dollop of ricotta cheese and a spoonful of onions.   Garnish with thyme leaves.

* pepper de-seeding tip:  I keep a large bowl of water next to my cutting board.  Once I cut a pepper in half, I scrap the seeds and white ribs out with my fingers under the water. This way the seeds fall away easily.

We know that your stuffing these baby peppers too!  Tell us.  With what?!

xo & a pinch

Kelly

Β 

IMG_4807.JPG

Maple Roasted Butternut Squash Salad

IMG_4810.JPG

Theres no better way to enjoy "harvest season" than to chow down on a few jewels from the farmers' market.  Here on the Jersey Shore, squash have taken over!  You cant avoid them.  They insist on going home with you.  

For Pam's Birthday dinner, I wanted to make a very colorful salad to counter her tan & brown dinner; Orecchiette with Sausage & Greens.  (Click here for the recipe post)  Its her favorite dinner and so super easy & quick that I had to muster some culinary creativity.  I decided to let the butternuts have their way.

Here's what you'll need:

  • 1 Butternut Squash, peeled, seeded and cut into cubes
  • 1 tbsp maple syrup
  • Fresh baby spinach leaves, about 4 cups  ( I added some mixed baby lettuces too)
  • dried cranberries, about 1/4 cup
  • pine nuts, about 1/4 cup, toasted
  • 1/4 red onion, thinly sliced
  • "Pam" cooking spray

For the dressing.  Whisk or shake together the following:

  • 2 clementine oranges, juiced
  • 1 tbsp Sweet Chili Sauce (found in the Asian Section of your Grocery Store)
  • Olive Oil, about 3 tbsp.
  • Salt & pepper

What you'll do:

1.    Preheat oven to 350 degrees, while you prepare the squash.  Once its cubed, toss onto a "Pam -sprayed" baking sheet with maple syrup, salt & pepper.  Roast in the oven for 20-25 minutes or until fork tender.  Then turn the oven to broil for 5 minutes to get a little char on them. (the charring is optional)

2.  Meanwhile, in a dry skillet on medium heat, toast the pine nuts until golden and fragrant, about 5 minutes.

3.   In a large bowl or serving platter, toss together spinach, squash, pine nuts, onion, and dried cranberries.   Add dressing and combine.

No need to let the squash or nuts cool completely, if the spinach wilts a bit under the heat all the better.

Enjoy your butternuts!

xo & a pinch,
Kelly

IMG_4812.JPG

Roasted Butternut Squash Soup

Welcome Fall!

Welcome Fall!

A good for you, low fat & yummy butternut squash soup, yup!

This is one of those recipes that marks the start of fall for our household.  It's a rare combination of comfort food and health food; a winner!   I generally make it with non-fat "College Inn" chicken broth because personally, I can't taste the difference in this recipe and I prefer a lighter substitute to heavy cream. All the luxurious richness comes from a good whirl in the blender!

One time, I made this soup as an appetizer for a family event and went off the reservation- I didn't "measure!"  BIG MISTAKE.  I got a little over zealous with the ginger and ended up tossing the entire batch into the trash, so as to avoid ginger-burns on the tongues of the entire Nicastro clan (my maiden name). Needless to say, I learned my ginger lesson the hard way, as did that poor, discarded butternut squash.  Bottom line, MEASURE your ginger, please, unless you're like my girl, Pinch, in which case you probably just know...

Here's what you'll need:

  • 3 tbsp vegetable oil
  • 2 teaspoons fresh ginger, minced
    • Use a microplane to get it as minced as possible. If you don't have a microplane, eventually you'll need one but, peel slices off with a potato peeler then chop/mince as finely as possible.
  • 1/4 teaspoon cinnamon
  • 1 flat tablespoon brown sugar
  • 2 cloves garlic, finely chopped
  • 2 cups, chopped onion
  • 2 small butternut squash (about 4 lbs total- pre-cut)
  • 4 1/2 cups of chicken broth if you like your soup thick
    • 5 1/2-6 cups if you prefer a thinner soup

Toppings vary but, I like to use:

  • Creme Fraiche
  • Toasted pine nuts
    • toast in toaster oven at 400 with some kosher salt, until light brown
  • Sage leaves
    • saute in butter until a little crispy

Pre-heat your oven to 370, cut your squash in half (be careful) and take the seeds out. Place cut side down on a cookie sheet and bake for about 40-45 minutes until soft. Take it out of the oven and let it cool before you peel and chop it up.

In a heavy dutch oven or large sauce pan, heat up your vegetable oil and add onion, garlic, cinnamon, brown sugar & ginger in the pan. Cover it and let it cook for 10-15 minutes, stir occasionally but, keep the top on.

After you peel your squash, cut it up into 2-3 inch pieces and pop it into the party in the pot. Then, add the broth. Cover it again, let it simmer on medium heat for another 10-15 minutes.

All of this, in small batches will need to run through your blender but, keep in mind you never want to blend HOT liquid. Let it cool down before you put it in the blender (not kidding) I think every one I know that's tried this has a story about being covered in burning hot liquid, there's no reason for that, just let it cool down a bit. You can put it back on the stove and re-heat it before you serve it once it's blended.

Be safe and enjoy! :)

xo Measure

A drizzle of creme fraiche, sage leaves & pine nuts 

A drizzle of creme fraiche, sage leaves & pine nuts 

Grilled Pizza Party!

Come on over!  Its a party!

Come on over!  Its a party!

Measure rolling out our dough! 

love this picture of me (measure) I feel like an Italian grandmother! 

love this picture of me (measure) I feel like an Italian grandmother! 

How wonderful is it that you can grab pizza dough from the grocery store and quickly transform yourself into a pizza Chef in your own kitchen?!   You can go from calling-it-in to Pizza Rock Star, so why not?   Grab some dough from your dairy section and get rolling.

We love Pizza night at the M&P kitchens.  Christmas, three years ago, Kelly & Pete bought us the greatest gift!  - a "pizza kit!"   It was awesome;  the stone, the giant wood spatula, the rolling cutter... all things pizza in a big basket.  Needless to say, we made pizza for months!  You don't really need all the bells & whistles, we just love them.   All you really need is a sheet pan and your grill.

As summer ends and our grilling days become numbered, we decided to take it outside.  Grilled Pizza...as if pizza needed to get more delicious.

All the crusts are rolled out into a large rectangle shape, only because that's the shape of the aluminum pan we had for the grill!  We grilled the dough for 8-10 minutes on medium-high heat and then began "dressing" each pizza to our hearts content.  The results were personalized pizza perfection!   Here are our four creations:

Roasted Tomato Basil Pizza

On a sheet pan, we tossed tomatoes with olive oil, salt, pepper, oregano and roasted in a 350 degree oven for 20 minutes.  We topped the grilled crust with the roasted tomatoes and fontina cheese and grilled again for 5-8 minutes to melt the cheese.  Close the grill top or tent with aluminum foil to melt the cheese.   Once off the grill, top with fresh basil leaves.

  • Three large tomatoes
  • And, if you want, some baby grape tomatoes (halved)
  • One tablespoon olive oil
  • 1/2 cup of fontina cheese
  • Fresh basil
Tomato, Fontina, Basil 

Tomato, Fontina, Basil 

Roasted Red Pepper and Artichoke Pizza

Top the grilled crust with fresh ricotta, sliced roasted pepper and artichoke pieces and placed under the covered grill for 5 minutes.  We topped with salt, cracked peppercorns and torn basil leaves.

  • Marinated artichoke hearts
  • Marinated Roasted Red Peppers
  • Ricotta cheese
  • Fresh basil leaves
Roasted Red Pepper, Artichoke 

Roasted Red Pepper, Artichoke 

Mushroom, Thyme & Goat Cheese Pizza

  • 10-13 Mushrooms (we used Baby Bellas) sliced.
  • 1 Shallot, sliced
  • Olive Oil
  • 1/2 bunch fresh Thyme
  • Goat Cheese 3 oz. log
  • Secret ingredients:
    • Brown Sugar (a generous sprinkle)
    • Worcestershire Sauce (a generous shake or 2)

Swirl olive oil in large skillet over medium heat. Once the oil shimmers,  add shallot & 1/2 bunch of thyme (you can leave the stems on, let the leave fall off and pull the stems out later). Add mushrooms and reduce, probably about 5-10 minutes, then add the secret ingredients. The longer they cook on low heat, the better.  Add water (or red wine) to the mushrooms if you see the ingredients stiffening up.

Top grilled crust with generous sprinkle of crumbed goat cheese and mushroom topping.   Heat under covered grill for 5 minutes to warm cheese.   Garnish with fresh thyme leaves.

Mushroom, Thyme & Goat Cheese Pizza

Mushroom, Thyme & Goat Cheese Pizza

Prosciutto & Arugula Pizza

  • 1 cup fontina cheese,
  • 1 cup arugula
  • 1/4 lb prosciutto
  • Olive oil drizzle (about 1 tbsp)
  • 1/2 Lemon, squeeze

Sprinkle the fontina across the grilled crust, top with slices of prosciutto and arugula. Drizzle with olive oil, a squeeze of lemon and voila!

Prosciutto & Arugula Salad

Prosciutto & Arugula Salad

All were scrumptious!   But THE WINNER IS....

Mushroom, Thyme & Goat Cheese 

Mushroom, Thyme & Goat Cheese 

Mushroom, Thyme & Goat Cheese Pizza!

What a surprise!  Kelly's husband doesn't even like mushrooms!   We think it was the secret ingredients.... brown sugar for the win!

What is your favorite type of pizza?

Happy Pizza Grilling!

Mangia! Mangia! Mangia! ..y Bevi  !

Measure & Pinch xo

Β 

Β 

Β 

Crab Cakes a la Pearl

IMG_4683.JPG

The Pearl Oyster Bar is Kelly's "ultimate most favorite restaurant"  in New York (in her words).  She talked about the restaurant, the lobster roll, the oysters and the crab cakes with such love in her heart that I couldn't wait to try it! Being from Boston, I do consider myself a  connoisseur of the "lobsta" roll.

I was so excited when we finally went!  It was a girls night,  for my birthday! ( I love my birthday ).  They don't take reservations, so we got there just as it was opening; 6:00 PM and grabbed the best seats in the house at the bar.  It was the start of the best night ever and Kelly could not be more right about the Pearl.  This was the best lobster roll I have ever had.  And, the fried oysters? Ridiculous. This place is amazing...  a NYC must-go.

All that said, unfortunately, they stopped making the crab cake. (Kelly nearly cried)  So, we bought the cookbook,  Lobster Rolls and Blueberry Pie  written by the owner and Chef of Pearl Oyster Bar, Rebecca Charles (she was there, cooking that night!) and now, we re-create the Pearl crab cakes whenever we want!  (Rather, whenever lump crab meat is on sale!!)

We make them a bit smaller and Kelly makes a really easy remoulade-ish sauce.  These cakes are a staple for special occasions or whenever you feel like something super delicious.

IMG_4686.JPG

What you'll need for Pearl Oyster Bar Crab cakes.  We changed the recipe a tiny bit.

  • 1 lb lump crab meat
  • 1 tsp Dijon Mustard
  • 1 tsp dry mustard
  • 2 shakes of hot sauce
  • 4 shakes Worstershire sauce
  • 2 eggs
  • juice of 1/4 lemon
  • 1 tsp chopped chives, plus extra for garnish
  • 1 tbsp. diced and seeded tomato
  • 1/2 cup of toasted bread crumbs (Rebecca makes them homemade, we use 4C)
  • butter  (Rebecca uses clarified butter, we just melt some butter)
  • lemon wedges for garnish

What you'll do:

1.   In a large bowl, combine mustards, hot sauce, Worcestershire, salt, pepper, eggs and lemon juice.

2.  Add chives, crab, tomato and bread crumbs and toss together.

3.  On a large baking sheet, sprinkle bread crumbs into an even layer.  Using a 1/4 cup measuring cup to form, press mixture into the cup and unmold onto the bread crumbs.

4.  Sprinkle tops of crab cake with bread crumbs. Refrigerate for at least 30 minutes.

5.   When you are ready to fry, preheat oven to 450 degrees.  Heat a large ovenproof fry pan on your stovetop.  Melt 2 tbsp butter in the pan.   Remove the crab cakes from the refrigerator.

6.  Let the excess breadcrumbs fall away as you add each crab cake to the pan into hot melted butter.

IMG_4670.JPG

8.   Don't fuss with them.  Let them get golden brown-  about 4 minutes.

9.   Gently flip each crab cake, then place pan into the oven for about 5 minutes, until golden.

Β 

Β 

IMG_4680.JPG

Remoulade is a classic French condiment requiring much more preparation than Kelly has patience.  Here is her simple, special crab cake sauce:

  • Ketchup 1 tsp.
  • Mayonaise 1 tsp.
  • Dijon mustard 1/2 tsp.
  • Relish 1/2 tsp.
  • Paprika, a dash or 2
  • Juice of 1/2 lemon
  • salt & pepper

Whisk all ingredients together and top your crab cakes.

New England girl in a Jersey Shore world.

New England girl in a Jersey Shore world.

Thank you Pearl, for the most delicious memories and never-ending inspiration!

Thank you Pearl, for the most delicious memories and never-ending inspiration!

Visit the Pearl Oyster Bar at its one and only perfectly quaint location on Cornelia Street in the West Village. 

xo- Measure

Β 

Roasted Fig & Prosciutto

IMG_4404.JPG

I love it when you're at the Farmer's Market and something looks so good that you can't walk by without buying it!

Pinch (Kelly) and I were at the market last weekend and delicious inspiration was everywhere!    Fall is coming!!!

Anyway, these little figs jumped into our basket! Seriously, there was no walking by them. We agreed that prosciutto had to be involved but, we'd play the rest by ear when we got home.

We sliced these beauties in half and gave them a taste, we agreed roasting was the next step. Most of the time when you have prosciutto and figs together you wrap them and grill or roast them, not us- too much work!   We roasted the figs with a drizzle of balsamic and went with the "deconstructed" roasted fig, thanks to Pinch.

About one cup of arugula placed on a plate, top with 10-12 slices of prosciutto. Take the roasted figs with drizzle in a bowl, toss with cheese and pistachios. Place in the center of the plate.

  • 1 cup arugula, dressed lightly with a drizzle of olive oil, salt & pepper
  • 2 tablespoons of balsamic
  • 10-12 pieces of prosciutto
  • 1/4 cup of gorganzola, crumbled
  • 1/4 cup of shelled pistachios
  • 5-6 halved figs, tossed with a little olive oil, salt & pepper and roasted in a 350 oven for 8-10 minutes.

Delicious, delicious.

Happy weekend!

xo- Measure
Mexican Stuffed Baby Peppers

Baby peppers inspire me. I find myself thinking about them a lot!  Is that weird?  yes.

Months ago, I made a similar recipe to this one, but with an Italian twist; cannellini beans and bruschetta topping.  I posted it on Facebook and got lots of nice comments and "likes."  I couldnt help but wonder whether my friends were loving these cute baby peppers as much as I do and I wondered, of course- what are they doing with them?!  Tell us!

Also wondering...Did baby peppers inspire the creation and social media sharing of  Measure & Pinch?  quite possibly.
Have I turned into one of those people that answers my own questions?  clearly.

Here's what you'll need for 15-20 pepper appetizers:

  • Approximately 1 cup "Regret- Free Re-fried Beans" See, recipe below.
  • 1 can of red beans, 15 oz, rinsed
  • 1 clove garlic, minced
  • SPICES
    • 1/2 tsp cumin
    • 1/2 tsp chili powder
    • 1/2 tsp cayenne peppers
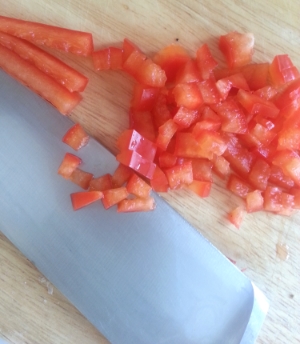
  • 1 bag baby peppers, rinsed and halved
  • 1/2 cup cheddar cheese, shredded
  • 1/4 cup sour cream
  • 1/4 cup cilantro leaves
  • 1 can jalepenos or one fresh jalepeno, sliced

Regret-Free Re-Fried Beans:

Combine beans, minced garlic and spices in a large skillet.  Heat on medium until the garlic is fragrant and the beans soften.  Mash beans with a potato masher until chunky.  Add water as you mash to get a smooth consistency.  Add salt & pepper and stir.  Heat 5-8 minutes.

For the Stuffed Peppers:

1.   Pre-heat oven to 350 degrees

2.  Slice each baby pepper in half length-wise, remove ribs and seeds.  Toss all of the halves together with a drizzle of olive oil, salt & pepper.  Place on baking sheet, spacing the pepper halves apart and placing skin-side down.

3.   Bake for 5-8 minutes.  Let cool.  Pat excess liquid with a paper towel, if necessary

4.  Spoon Healthy Re-Fried Beans into each pepper half, top with shredded cheese and return to the oven for 5 minutes until cheese melts.

5.  Garnish with sour cream, a slice of jalepeno and a cilantro.  Enjoy!

What are you doing with your baby peppers? 

Also-  Have you ever tried to take a good picture of re-fried beans??!   impossible. 

xo & a pinch,

Kelly

Coconut Corn Chowder with Sriracha Shrimp & Bacon

When something is being sold 6 for $1.00, I buy now and figure it out later.  These days, fresh summer corn is practically free.  We're so lucky to have fresh food in abundance at every farm stand- one of the best things about summer!   I love to use up the seasonal surplus while we have it.  (Basil, up next!)

In this chowder, corn becomes the main dish.  The coconut milk adds a little something sweet & special in contrast to the spicy, sriracha shrimp & salty bacon topping.  When I make this corn chowder, I make a big batch and hope for left-overs.  Never happens.  At the end of the night- Dutch oven empty- every time.

For the Chowder:

  • Bacon, 4 slices, diced and browned
  • I small sweet onion
  • 3 cloves garlic, minced
  • 5 potatoes, diced into 1/2 inch cubes
  • 1/2 green pepper, minced
  • 1/2 red pepper, minced
  • 1 13.5 oz. can coconut milk
  • Corn, 6-8 ears (approximately 3 cups of kernels)
    • husk and toss ears of corn with salt, pepper and olive oil.  Bake in 350 oven uncovered for 25-30 minutes.  Let cool before cutting kernels.
  • 2 cups chicken broth
  • 1 tsp red pepper flakes
  • 1 tsp Old Bay seasoning
  • 1 tsp cumin
  • salt & pepper
  • cilantro or scallions, fresh for garnish
About the size that you want your peppers and onions

About the size that you want your peppers and onions

1. Brown the bacon in a Dutch Oven over med-high heat.  Remove the bacon pieces with a slotted spoon and reserve on a paper towel lined plate.

2. Leaving the bacon grease in the Dutch Oven, add onion, garlic, peppers, potatoes and corn.  Heat through for 5-8 minutes, stirring once or twice.

3. Add red pepper flakes, Old Bay and cumin. Season with salt & pepper. Stir in chicken broth and coconut milk and bring to a soft boil.  Reduce heat and simmer for 15-20 minutes until heated through and potatoes are tender.  Taste for preferred seasoning.

While the chowder is simmering, cook the shrimp.

For the Shrimp:

  • 1/2 lb peeled, tail-on Shrimp
  • 1 tbsp butter
  • 2 cloves garlic, minced
  • 1 tbsp olive oil
  • 2 tsp Sriracha
  • salt & pepper

In a large skillet, heat olive oil, butter and garlic on medium heat.   Add Sriracha sauce and sautΓ© until shrimp is pink and opaque, 5-8 minutes for medium-sized shrimp.

To serve:

Ladle chowder into bowls and top with 2-3 shrimps, crumbled bacon, scallion or cilantro.

Β 

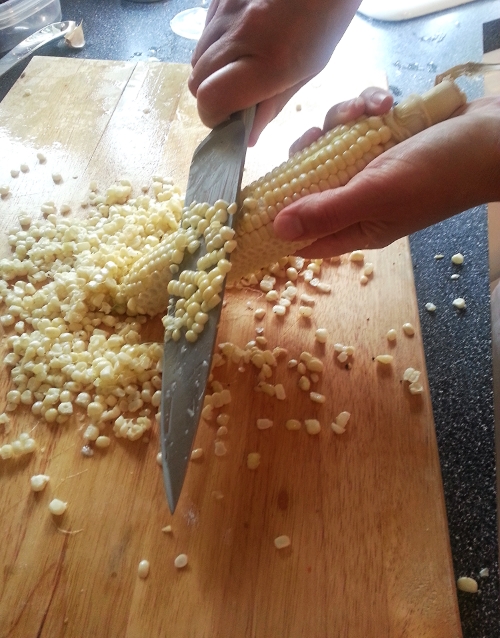
My corn kernel cutting method

My corn kernel cutting method

Notes:

  • I find that holding the cob on its side and cutting away (rather than down) makes for easier, quicker and more stable kernel removal.
  • For a creamier consistency, use an immersion blender or potato masher to blend some of the chowder during the process.
  • In the winter months, when corn is found only in the freezer section,  this recipe is still delicious!

How do you use summer's surplus of corn?

xo & a pinch,

Kelly

IMG_4151.JPG

Not So Naughty Nachos

Turkey Mushroom Nachos with Fresh Quick Pico

Dinner is served!

Dinner is served!

When its your 15th Birthday, this is dinner!

Our oldest boy turned 15 this past weekend, and like a good mom (step-mom, in this case), I ask my boys what they'd like for their birthday dinner and I'll cook whatever they wish.   Our house is all boys, all the time.  Even the dog is a boy.  This dynamic translates into sports & snacks 24/7.   So, it was no surprise when the birthday boy requested nachos for dinner. Chips are a food group, aren't they?

These nachos aren't completely regret-free, but they are a nice balance of good and not-so- good.  There are lots of little secrets inside that do a (growing boy's) body good.

Here's what you'll need:

  • 1 large bag of restaurant style tortilla chips
  • 1 lb lean ground turkey meat
  • 15-20 mushrooms (I like baby bellas) chopped in the food processor
  • 1 small zucchini, chopped in the food processor
  • 1 small white onion
  • 3 cloves garlic
  • 2  15 oz cans of small red beans, rinsed
  • 2 cups shredded cheddar cheese
  • pico de gallo, see quick & easy recipe below
  • low fat (or not) sour cream
  • Spices:   cumin, chili powder, cayenne, paprika
  • 1 tsp hot sauce
  • jalepenos, canned or fresh, sliced (optional)
  • black olives, canned, sliced (optional)

For the pico de gallo, you'll need:

  • 3-4 ripe tomatoes, chopped
  • 1 small bunch cilantro, chopped
  • 1 small white onion, chopped
  • 2 limes, juiced
  • salt & pepper

About the tomatoes, Pam says " With authentic pico, you have to core the tomatoes!  No seeds!"

I say "I dont have time for that nonsense.  It's 'quick un-authentic pico.'"

Authentic pico de gallo also calls for fresh jalepeno.   We have toddlers, so I leave the jalepenos out of the mix and top the nachos with them.  This way, they are visible and easy to pick out by the grown-ups.

Readers, the level of pico authenticity is within your discretion.  We trust you.

Combine ingredients in a large bowl, taste for deliciousness, and then store in the refrigerator for 1 hour or longer.  The longer it sits, the better it gets.

take a yummy bite!

take a yummy bite!

For the turkey topping:  Heat a large skillet over medium high heat with a swirl of olive oil.  Add the ground mushrooms, ground zuchinni and garlic to the skillet and brown.  Season with salt and pepper and cook until the vegetables reduce down and are soft, about 5 minutes.   Create a circle in the middle of the pan with your spatula - a place for the ground turkey to touch the pan.  Brown the meat, tossing together with the vegetables for about 10 minutes.  Season with more salt & pepper.  Add 1 tsp cumin, 2 tsp chili powder,  1/2 tsp paprika, 1/4 tsp cayenne and 1/2 tsp of hot sauce. Let simmer for 10 minutes.  Add water if necessary to keep the meat moving around. Taste for spicy flavor preference.  Add more seasoning, depending on how hot you like it.

For the beans:  Heat a smaller skillet over medium heat, add a swirl of olive oil.  Add beans and 1 glove of crushed garlic.  Add salt and pepper.  Mush with a potato masher until chunky.  Add water to gain a creamy consistency.  Heat for about 10 minutes.

Build your nachos:    Pre-heat oven 350 degrees.   Line a large baking sheet with aluminum foil.  Spread the tortilla chips in an even layer over the baking sheet.   Add the turkey meat and then the bean topping.  Sprinkle with shredded cheese and place in the oven for 10 minutes.   Once the cheese is melted remove from oven and top with pico de gallo, sour cream, jalepenos and olives (optional)

I promise they'll never know they're eating something (kind of) healthy!

Are you sneaky with vegetables?  Let us know how.

xo & a pinch,

Kelly

Β 

Β 

Veggie Spice Chill

garden fresh!

garden fresh!

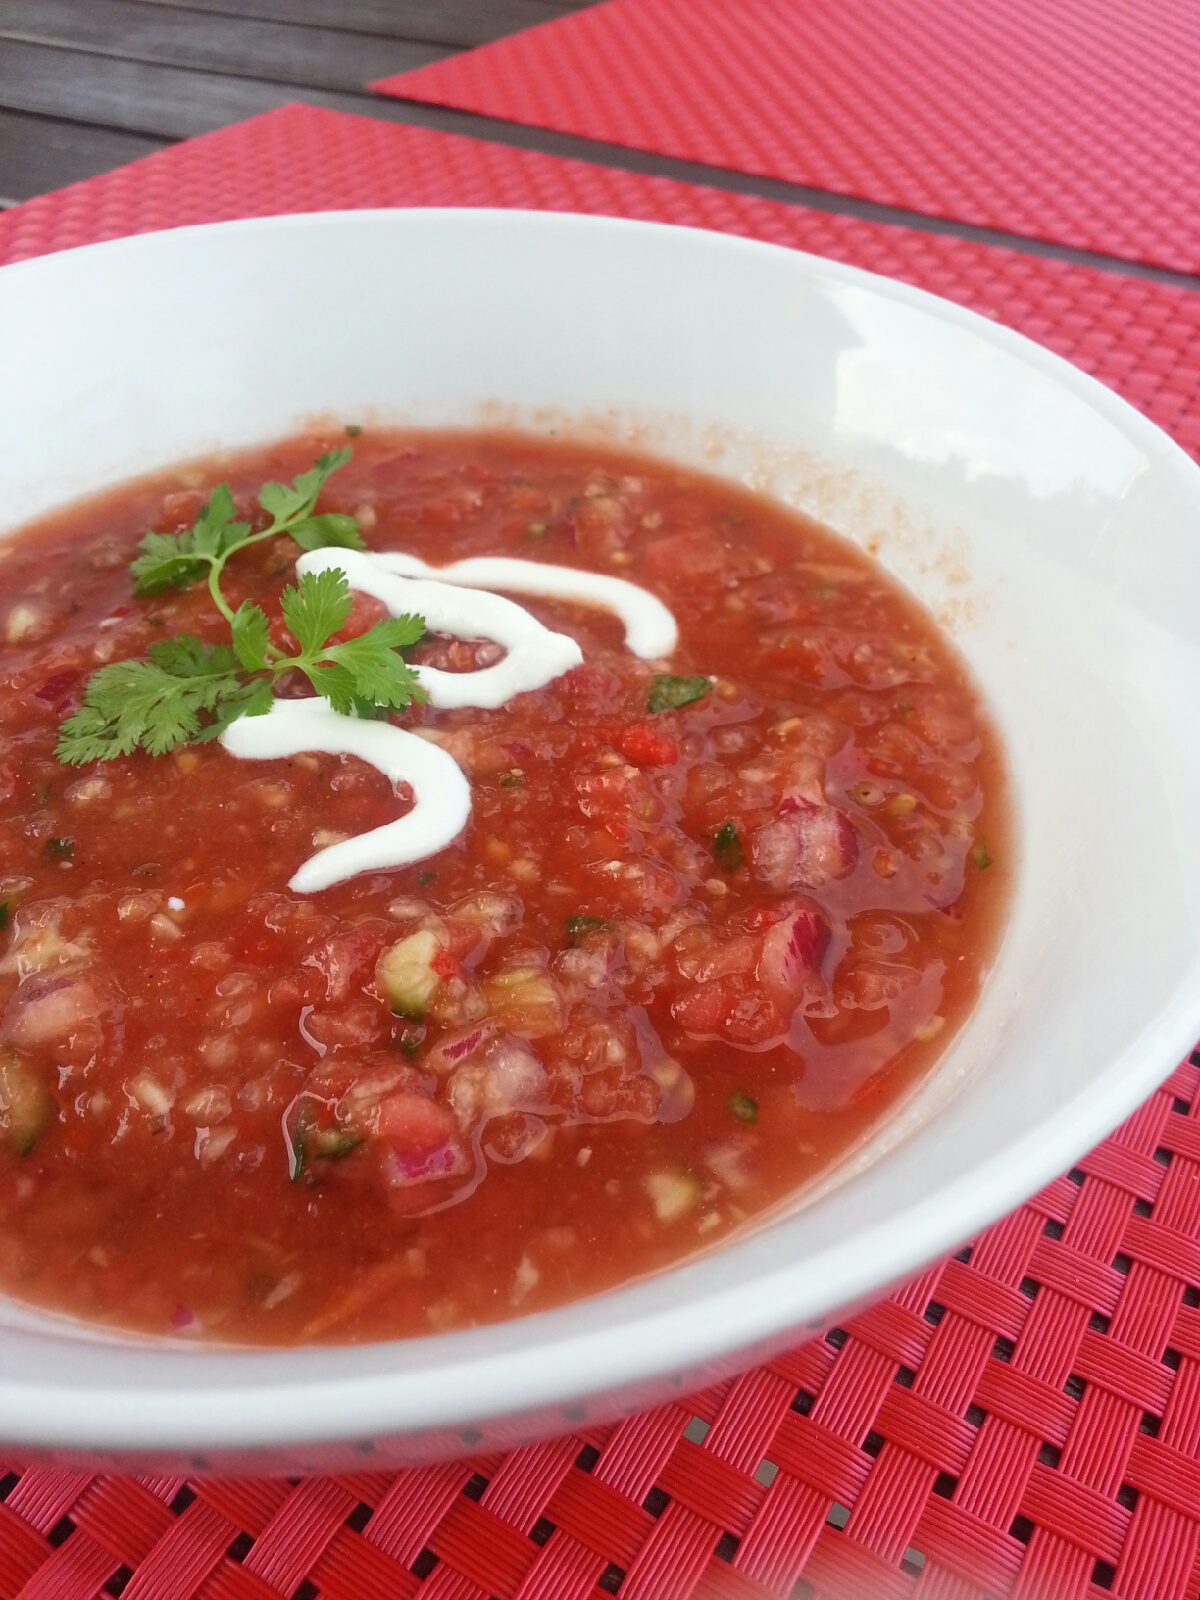
Roasted Red Pepper Gazpacho

In my sweetest dreams, I have an enormous garden right in my back yard.  Each week, I fill the biggest basket I can carry with fresh, gorgeous vegetables to share will my family and friends.  In reality however, I have a tiny herb garden and a patio tomato plant.  This week, we were lucky enough to pluck three ripe juicy tomatoes off of our plant.  (see above mixed in with store-bought plum tomatoes)  Perfect timing after this long, wonderful weekend of hot dogs, chips, pies, ice cream(s) and various libations.   

Gazpacho is my favorite way to eat healthy.  Its spicy and delicious... with tortilla chips and a margarita! 

What you'll need:

  • 6-8 tomatoes, chopped
  • 1/2 red onion, chopped
  • 1/2 cucumber, chopped with the peel on
  • 1/3 cup roasted red peppers, chopped (jarred is fine)
  • 3 garlic cloves, minced
  • 1 1/2 cup of V8 juice
  • 3 tbsp red wine vinegar
  • 2 tsp hot sauce
  • 2 tsp olive oil
  • 1 tsp red pepper flakes
  • salt & pepper

What you'll do:

Combine all of the above items in a large bowl.  Toss everything together and taste a few bits to be sure its the spicy-ness that you like.  Then, blend everything.  I use a standard kitchen blender on the "pulse" setting until I get a small chunks.  I do it in batches and combine the blended gazpacho in a large Tupperware.  Be sure to CHILL your gazpacho at least one hour before serving ( a very important step ).   Garnish with cilantro and a tiny swirl of sour cream or olive oil.

There are a ton of variations on this classic.  How do you make yours?

xo & a pinch,
Kelly

All chopped up in a bowl.  Take a little taste now, before you start blending.

IMG_3936.JPG

Eso Gazpacho!

IMG_3931.JPG


Caprese Salad & the "rules" of Mozzarella

A perfect appetizer before any meal. 

My most beautiful Caprese... 

My most beautiful Caprese... 

A "measure" favorite but, who knew the rules about fresh Mozzarella? Not me. At least, not until I met my friend "Junior." Junior is the best. He makes fresh Mozzarella and fresh Burrata every day, literally. He works at the local fresh market/nursery and he's the absolute sweetest thing! Of course, we were chatting it up one day and he let me taste the Mozzarella I was buying. It was WARM!? Seriously? I almost died right there. It's one of those moments where you put both your hands over your face, not one, and simply say, ".. I can't.." Meaning, I can't take how incredible this is!! 

PS it's at that moment I also said, "well, I can't serve it until tomorrow so, I'll put it in the fridge.The blood drained out of Junior's face but, because he's so nice, he simply said, ".. you don't refrigerate fresh mozzarella. Ever.." He continued, "in fact, if you'd like, just before you serve it, dip into warm water.." 

So, some of you are thinking to yourselves "but, I've bought it in the refrigerated section of the supermarket.." Yes, that's true, and once it's refrigerated it needs to stay that way but, when fresh, leave it out! And, for crying out loud, don't let anyone put it in the fridge! (And, eat it within 24 hours..event hough Junior will tell you up to 48!) 

Ok, what's this recipe? 

  • Two ripe tomatoes (preferably from Jersey) 
  • 1 lb fresh Mozzarella (fresh mozzarella, which is different than mozzarella di bufalo, thanks for the coaching Junior!) :)  
  • 6 leaves of basil (I cut the leaves in half then cut slices with my scissors to sprinkle) 
  • Kosher salt & pepper
  • Amazing olive oil, from Spain, Greece or Italy
  • 1/2 lb container of assorted olives 

Slice up the tomatoes to be the same size as the cheese, one for one on the dish. Drizzle with olive oil, if you're measuring, use about 5 tablespoons. Sprinkle with salt, pepper and basil. Top with olives 

And, please meet my friend Junior.. 

The best! Junior, making fresh mozzarella 

Enjoy, xo Measure